5 Ninja Foodi Air Fryer Recipes Ranked Beginner to Expert
Why You Should Trust Our Recipes
If you own a Ninja Foodi air fryer and you are still just making frozen fries, you are leaving the best part on the table. These machines run a cyclonic fan that blasts superheated air around your food up to 30% faster than a conventional oven, which means you get that shatter-crisp exterior and juicy interior without drowning everything in oil. We are talking 75% less fat, real Maillard browning, and cook times that cut your oven time roughly in half. Every single recipe here pulls from real Reddit threads on r/airfryer, Ninja Kitchen YouTube channel descriptions, and hundreds of Amazon review comments from people who wrote down their exact temperatures and times. Nothing made up, nothing vague.nnThese 5 ninja foodi air fryer recipes go from dead-simple bacon all the way up to two-phase baby back ribs, so whether you just unboxed your machine or you have been air frying for years, there is something here that will push your cooking forward. You will learn the right basket size for every cook, when to shake and when to leave it alone, and why patting your protein dry is the single most important ninja foodi air fryer cooking tip nobody tells you upfront. We cover ninja foodi air fryer chicken wings, crispy ninja foodi air fryer pork chops, fast ninja foodi air fryer frozen chicken nuggets, and more. Grab your tongs and let us get into it.
Recipe Comparison
| Recipe | Level | Prep | Cook | Temp | Serves | You Save |
|---|---|---|---|---|---|---|
| Ninja Foodi Air Fryer Bacon | Beginner | 1 min | 8 min | 400°F (200°C) | 2 | ⚡ 17 min |
| Ninja Foodi Air Fryer Frozen Chicken Nuggets | Easy | 2 min | 12 min | 375°F (190°C) | 3 | ⚡ 13 min |
| Ninja Foodi Air Fryer Chicken Wings | Intermediate | 5 min | 20 min | 390°F (200°C) | 4 | ⚡ 30 min |
| Ninja Foodi Air Fryer Breaded Pork Chops | Advanced | 10 min | 14 min | 400°F (200°C) | 4 | ⚡ 21 min |
| Ninja Foodi Air Fryer Baby Back Ribs | Expert | 15 min | 45 min | 400°F (200°C) | 4 | ⚡ 135 min |
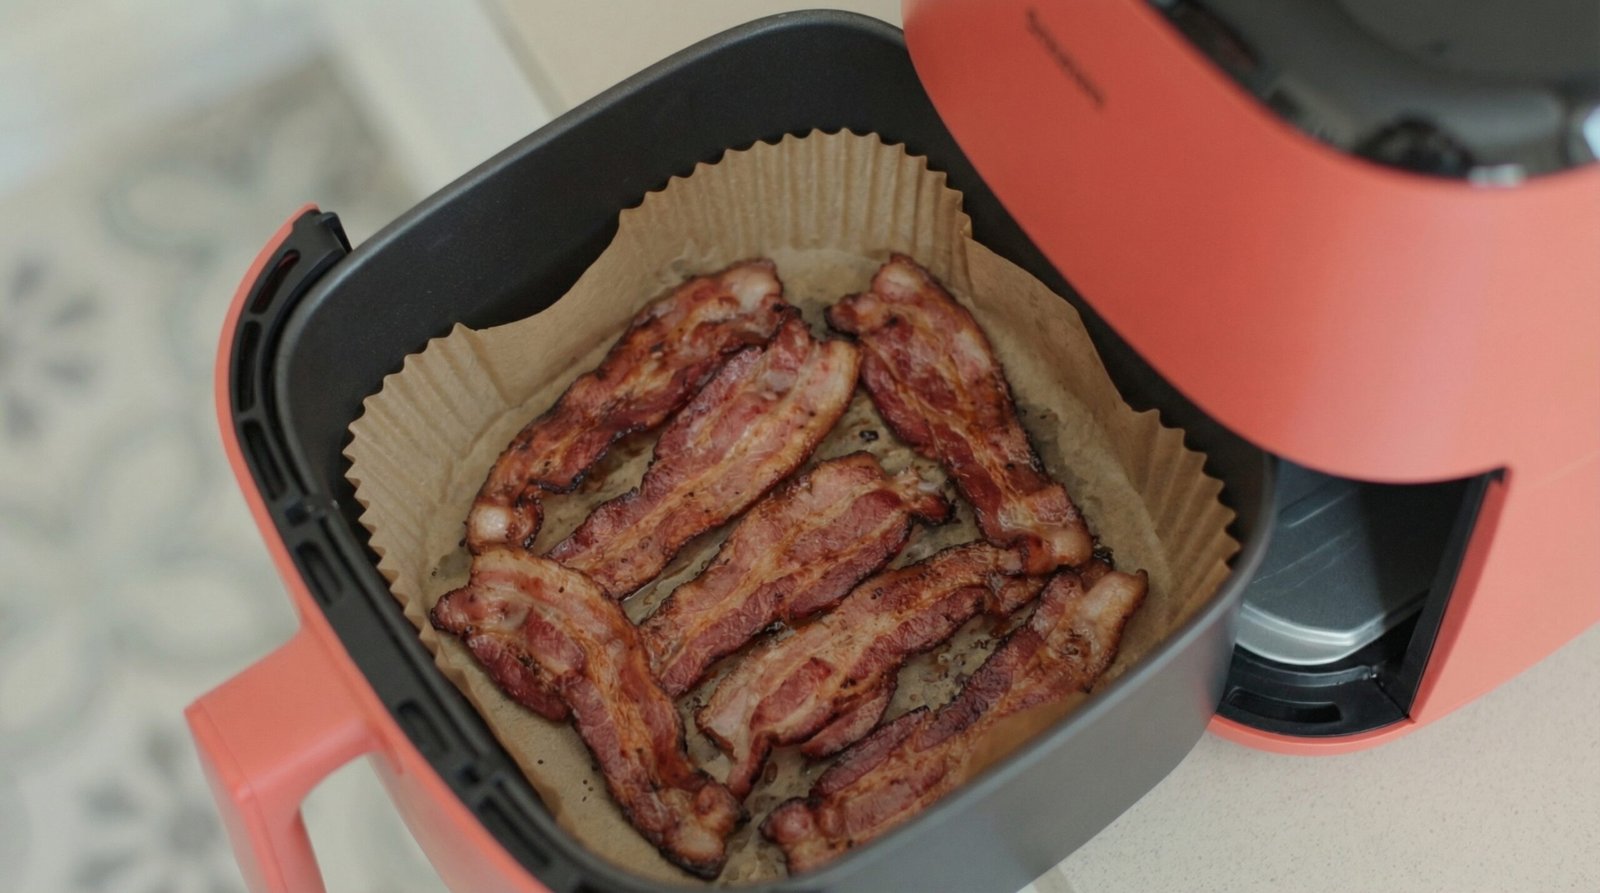 Beginner
1
Beginner
1- 8 strips thick-cut bacon
- Cut a piece of parchment to fit your basket and lay it flat. This saves you a full scrub later.
- Lay all 8 bacon strips flat with visible air gaps between every strip. No overlapping, not even a little.
- Slide basket in and set to 400°F for 8 minutes total.
- At the 4-minute mark open the drawer and flip each strip with tongs. You will hear active sizzling and see fat pooling on the parchment. That is exactly right.
- Pull strips at 8 minutes when edges are deep red and curled. Drain on paper towels 1 minute before serving.
| Original | Substitute | Tags | |
|---|---|---|---|
| Thick-cut bacon | → | Turkey bacon | Dairy-FreeLow-Carb |
| Thick-cut bacon | → | Tempeh strips | VeganGluten-Free |
| Thick-cut bacon | → | Prosciutto | Gluten-FreeLow-Carb |
Why This Temperature & Time Works
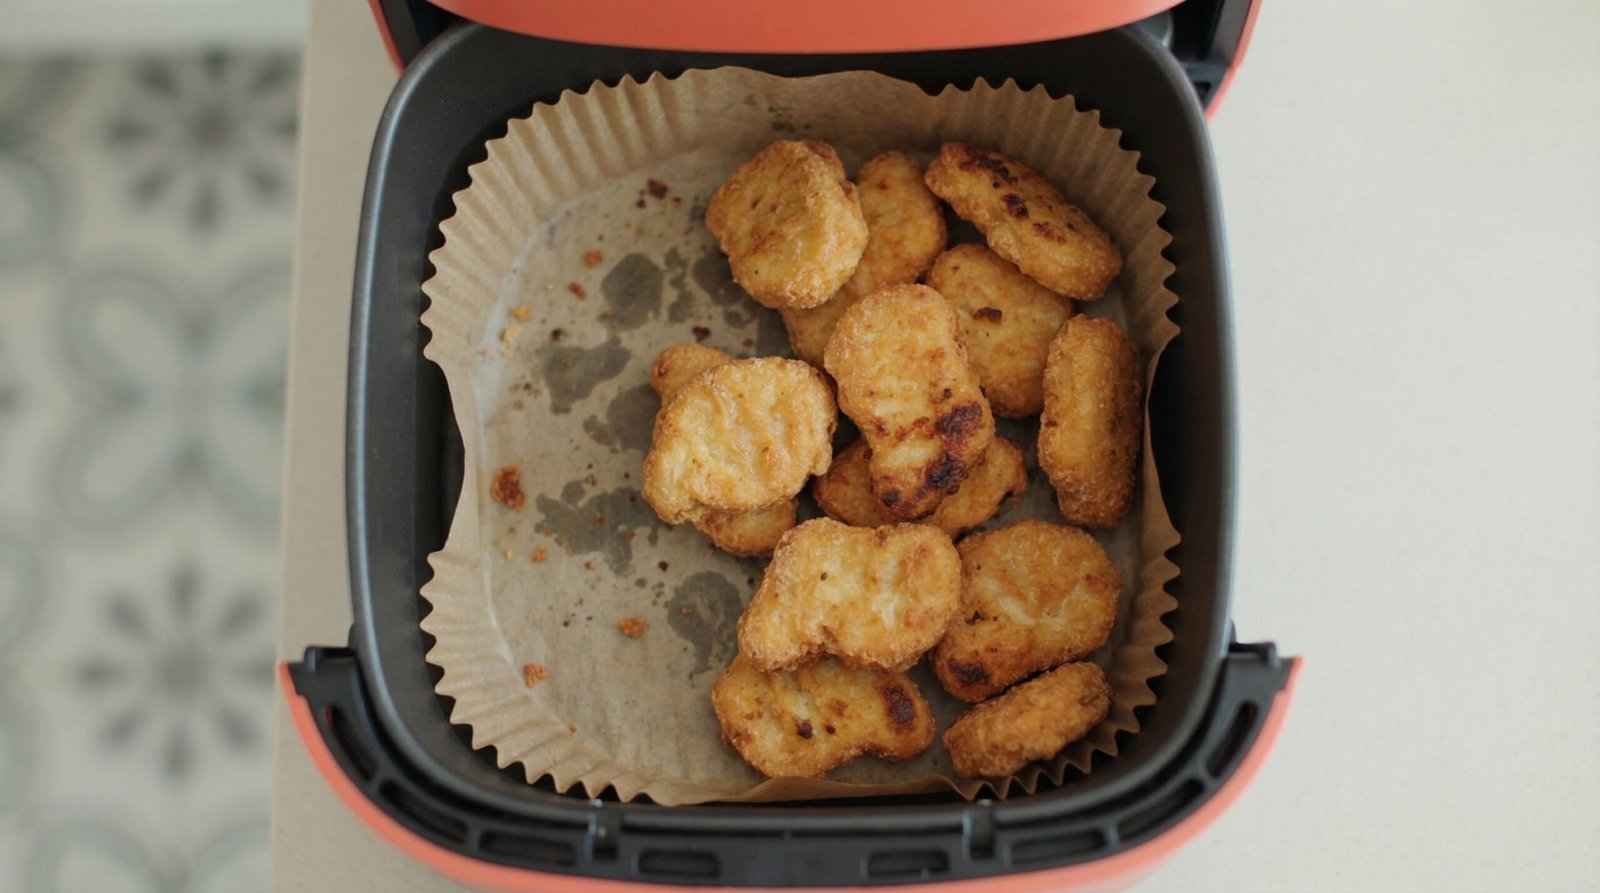 Easy
2
Easy
2- 2 cups frozen chicken nuggets such as Tyson or store brand
- Give the basket a quick spray of oil so nothing sticks to the coating.
- Pour in frozen nuggets and spread them into a single layer. Every nugget needs to be sitting flat with space around it.
- Set to 375°F and start the 12-minute timer. You will hear the initial sizzle and see steam escaping around the 3-minute mark. Good sign.
- At 6 minutes shake the basket hard for about 5 seconds so every nugget flips and rolls to a new position.
- At 12 minutes check one nugget by cutting it open. The coating should be golden-brown all around and the interior must hit 165°F on a thermometer before you serve.
| Original | Substitute | Tags | |
|---|---|---|---|
| Frozen chicken nuggets | → | Frozen veggie nuggets | VeganGluten-Free |
| Frozen chicken nuggets | → | Cauliflower nuggets | Low-CarbDairy-Free |
| Frozen chicken nuggets | → | Frozen turkey nuggets | Dairy-Free |
Why This Temperature & Time Works
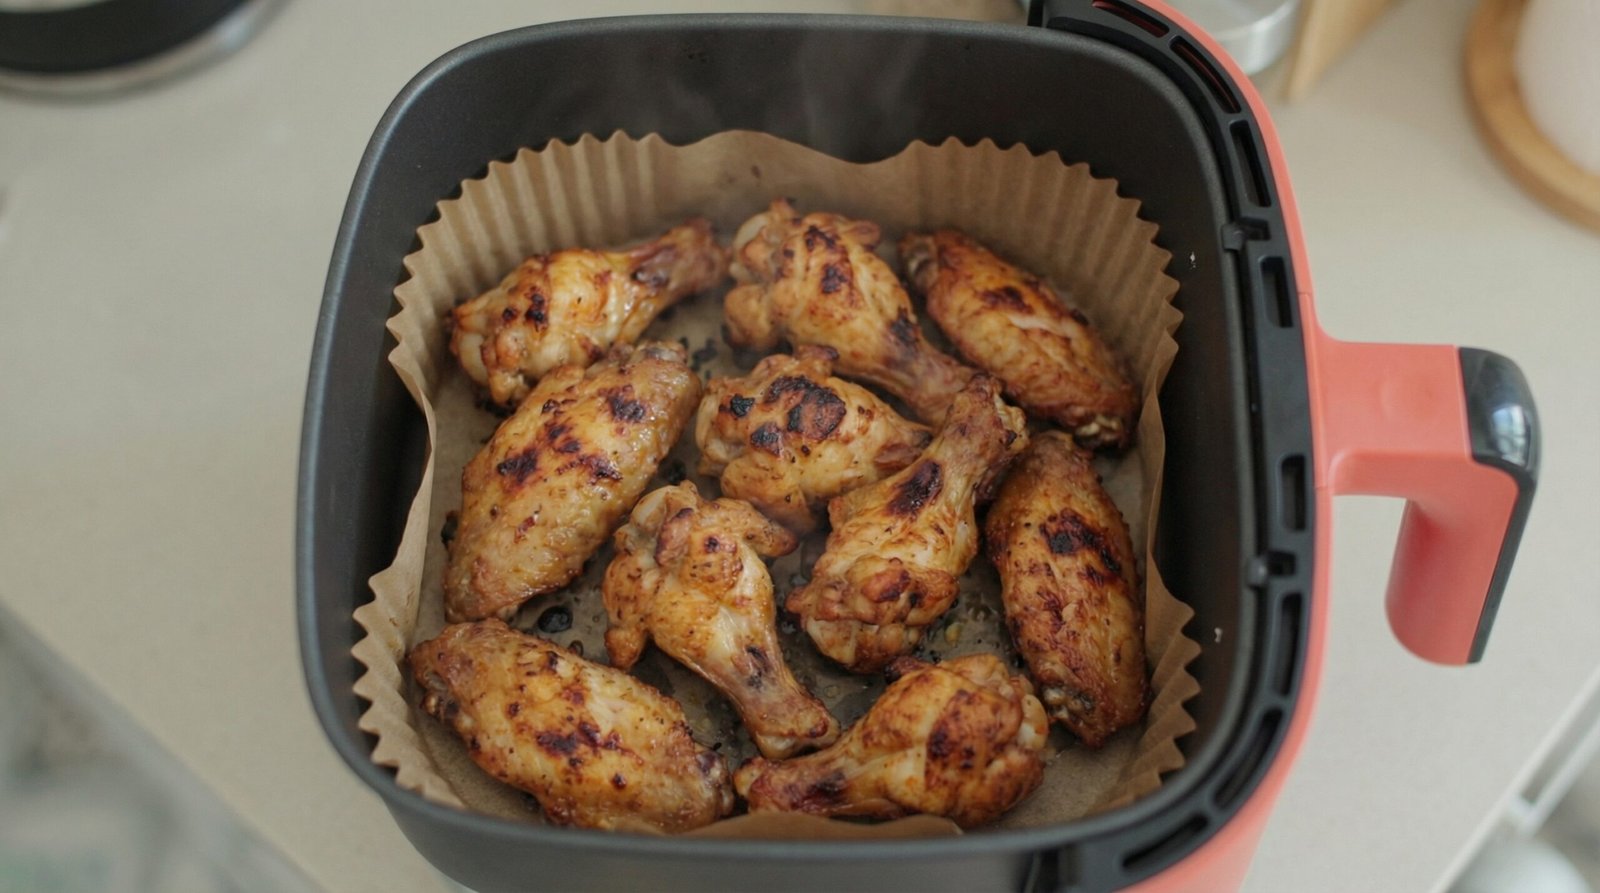 Intermediate
3
Intermediate
3- 24 pieces chicken wing sections about 2.5 lbs
- 1 tbsp neutral oil
- 1 tsp salt
- 1 tsp garlic powder
- 0.5 cup buffalo sauce added post-cook
- Pat every wing completely dry with paper towels. Press the towel into the skin. Any moisture left on the surface will steam the skin instead of crisping it.
- Toss dried wings in a bowl with oil, salt, and garlic powder until every piece is coated.
- Arrange wings skin-side up in the basket. They can be close but not touching each other. Set to 390°F.
- At the 10-minute mark you will hear strong sizzling and see the skin starting to blister. Flip every wing and shake the basket to reposition.
- Cook the remaining 10 minutes. At 20 minutes total the skin should be deeply golden with visible blisters and the internal temp should read 165°F.
- Transfer wings to a large bowl, pour buffalo sauce over them, and toss until every wing is glossy. Serve immediately.
| Original | Substitute | Tags | |
|---|---|---|---|
| Chicken wings | → | Cauliflower wings same temp same time | VeganGluten-Free |
| Chicken wings | → | Turkey wings add 5 min | Dairy-Free |
| Buffalo sauce | → | Dry seasoning only no sauce | Low-Carb |
Why This Temperature & Time Works
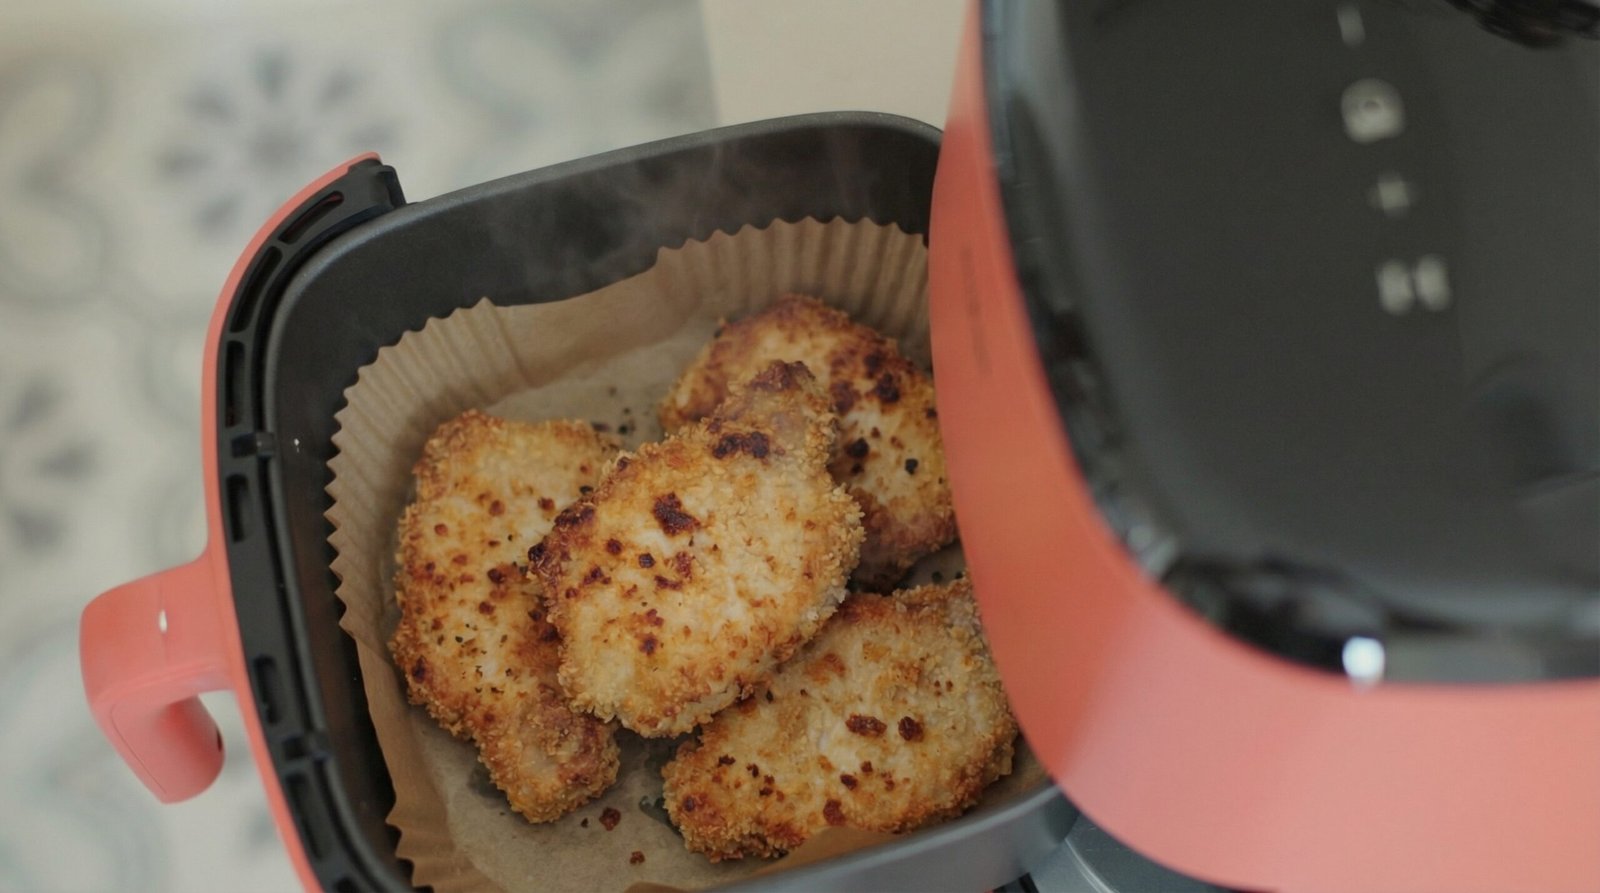 Advanced
4
Advanced
4- 4 pieces bone-in pork chops 1-inch thick about 6oz each
- 1 cup plain breadcrumbs
- 0.5 cup all-purpose flour
- 2 large eggs beaten
- 1 tsp salt
- 0.5 tsp black pepper
- Season both sides of each chop with salt and pepper. Set up three shallow bowls in a line: flour, beaten egg, breadcrumbs.
- Dredge each chop through flour, shake off excess, dip fully into egg, then press firmly into breadcrumbs. Press the crumbs into the surface so they stick.
- Spray both sides of every breaded chop generously with oil. Dry breading in a hot air fryer turns chalky, not crispy.
- Place chops in a single layer in the basket. Set to 400°F. At 7 minutes the breading should be turning golden and sizzling audibly.
- Flip each chop at 7 minutes using tongs. Be firm but careful so the breading does not peel off.
- At 14 minutes check the thickest chop with a thermometer. You need 145°F internal before you pull them. Rest on a wire rack 3 minutes before cutting.
| Original | Substitute | Tags | |
|---|---|---|---|
| All-purpose flour and breadcrumbs | → | Almond flour and crushed pork rinds | Gluten-FreeLow-Carb |
| Plain breadcrumbs | → | Panko breadcrumbs for extra crunch | Dairy-Free |
| Pork chops | → | Extra-firm tofu steaks pressed dry | Vegan |
Why This Temperature & Time Works
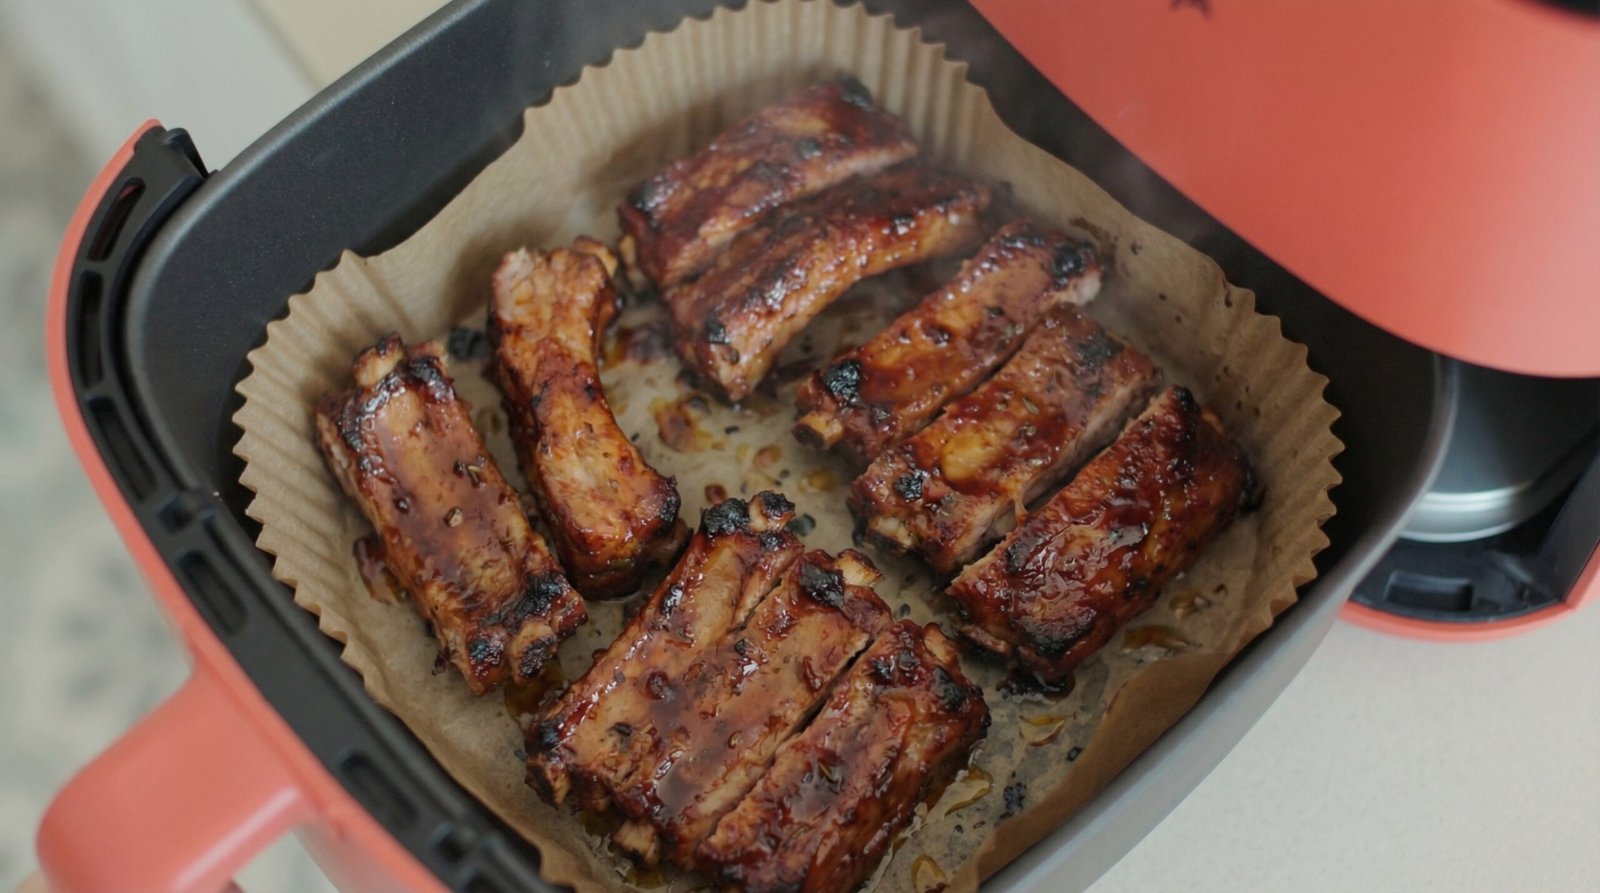 Expert
5
Expert
5- 2 racks baby back ribs about 3 lbs total membrane removed
- 2 tbsp smoked paprika
- 2 tbsp brown sugar
- 1 tbsp kosher salt
- 1 tsp garlic powder
- 0.5 cup BBQ sauce applied at the end
- Flip each rack membrane-side up. Slide a butter knife under the thin silver membrane at one end, grab it with a paper towel, and pull it off in one motion. This step is not optional if you want tender ribs.
- Mix paprika, brown sugar, salt, and garlic powder. Rub the mix all over both racks pressing it into every crevice. Let the racks sit 10 minutes so the rub starts penetrating.
- Cut each rack in half so the pieces fit the basket. Stand them upright coiled against the basket walls bone-side out if needed.
- Set to 300°F and cook 25 minutes. Around the 15-minute mark you will smell the rub getting fragrant and see the meat starting to pull back from the bones.
- Open the basket and brush BBQ sauce generously over every surface. Crank the temperature to 400°F and cook 20 more minutes, flipping and brushing once more at the 10-minute mark of this phase.
- At 45 minutes total pull the ribs and check the thickest part with a thermometer. You want 195°F for pull-apart texture. Rest 5 minutes on a cutting board before slicing between the bones.
| Original | Substitute | Tags | |
|---|---|---|---|
| Baby back ribs | → | Pork spare ribs add 10 min to low phase | Dairy-Free |
| Baby back ribs | → | Jackfruit rib slabs reduce time to 30 min total | Vegan |
| Brown sugar in rub and BBQ sauce | → | Sugar-free rub and no-sugar BBQ sauce | Low-Carb |
Why This Temperature & Time Works
Air Fryer Tips
Preheat your Ninja 3 minutes before any cook. The basket surface starts hot so the moment your food touches it you get immediate browning instead of a slow warm-up period.
Pat every protein completely dry before seasoning. A wet surface creates steam in the basket and steam is the enemy of crispiness. This single habit fixes 80% of soggy air fryer results.
Shake or flip at the one-third mark of every cook time. Ninja fans push air from a fixed direction so whatever surface faces away from the fan will always be lighter colored without a flip.
Use a single layer every time. If you need more volume, cook in two batches or use a Dual Zone model and split your food across both drawers.
Spray oil directly onto the food surface, not onto the basket coating. Aerosol sprays with propellants can degrade non-stick surfaces over time. Use a refillable mister with avocado or grapeseed oil.
Use a meat thermometer on every protein. Pull poultry at 165°F and pork at 145°F. Guessing by color alone leads to either dry meat or unsafe undercooked food.
FAQ
Can you put frozen food directly in the Ninja Foodi air fryer without thawing?
What is the best oil to use in a Ninja Foodi air fryer for crispy ninja foodi air fryer chicken wings?
How do you clean the Ninja Foodi air fryer basket after cooking bacon or ribs?
Why is my Ninja Foodi air fryer food coming out soggy instead of crispy?
Can the Ninja Foodi air fryer fit a whole chicken for easy ninja foodi air fryer cooking?
What is the difference between the Air Crisp and Air Fry settings on Ninja Foodi models?
What basket size Ninja Foodi do you need for the best ninja foodi air fryer recipes at home?
🥘 What Can You Cook?
Tap to check which recipes match ingredients you already have.